Looking for an inexpensive way to update your tub without breaking the bank? Then read on, my friend.
If you're anything like me then you've spent countless hours on Pinterest pinning and dreaming of a freestanding tub with beautiful tile in front of a gorgeous picture window overlooking an amazing view. Here's my reality...
We live in a subdivision. My view is the back of my neighbors house.
Also, because we live in a subdivision I'm not trying to have the most upgraded house on the block only to be disappointed when it's time to sell. So once the kids are off to college in a handful of years and our options are broader geographically speaking, then we will find some land where we can build our dream {pinterest} home. Until, then I'm working with what we've got and making the best I can with what we've got.
I'm A-OK with that too. I love a good DIY that gets my creative wheels turning, and upgrading for a fraction of the cost gets me as giddy as a school girl.
You know what doesn't get me as giddy as a school girl?
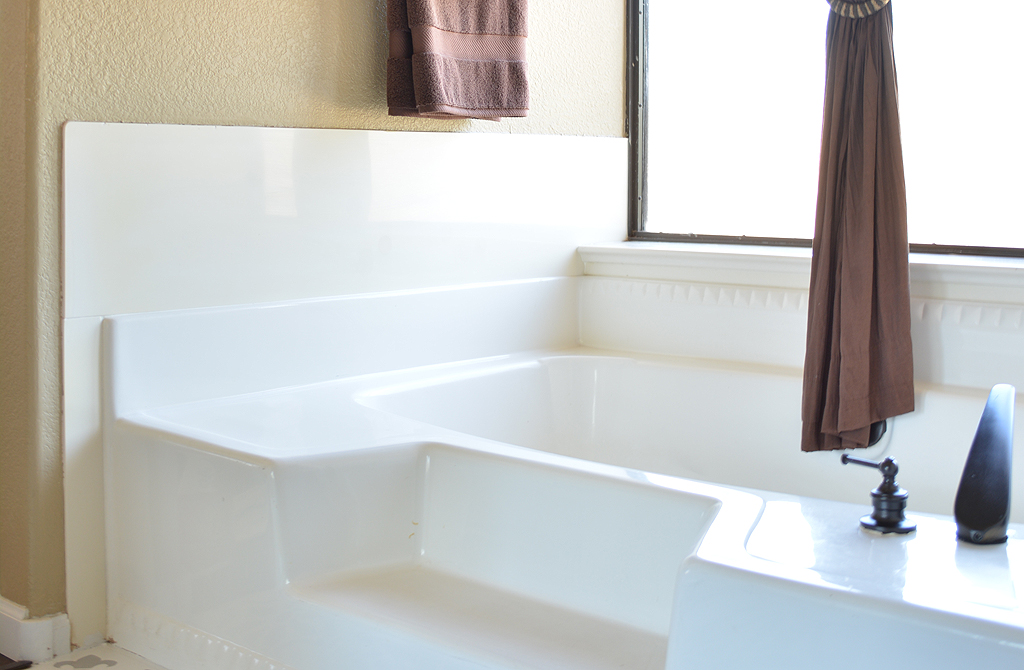
This plain ol' discolored splash guard over my tub...
{This post contains affiliate links at no additional cost to you, but allows us to receive a small percentage of the
sale to continue to bring you awesome DIY tutorials. Thank you for your help in supporting our small business!}
Honestly, there's nothing about that space that makes me giddy. All that brown and beige... I'm so glad paint trends have moved away from that!
I've spent the last 2 years dreaming of ripping all of that out and installing a freestanding tub with a new chandelier and all that jazz. It wasn't a priority on the project list so I didn't touch it and tried to ignore it all the best I could.
Well, the time has finally come to give the master bath the attention it needs and as much as I'd love to gut it and start over, I'm a total cheapo at heart and find fun in coming up with unconventional ways to make things fabulous.
After many ideas running through my head about how to mask that splashguard but still keep it functional in case it gets wet, it finally dawned on me to add moulding to give it that board and batten look. Always classic! So I started browsing Pinterest and the web for inspiration and ideas on how to make it functional. Who would've guessed I wasn't the first person to think of this?!
*Insert smug face*
So here's how to take your boring ol' tub from drab to fab in a few simple steps without breaking the bank...
SUPPLIES
- 2-inch PVC Colonial Moulding (PVC is important as it will repel water and resist moisture)
- 2-inch PVC Flat Casing
- 2-inch angled nylon paint brush
- Clamps (if needed)
- Krud Kutter
- Scoth Brite Pads
- Disposable Gloves
- Microfiber Cloths
- DeGlosser
- Painter's Tape
- Kilz Oil Based Primer
- Loctite Adhesive Caulk
- Rustoleum Linen White Chalked Paint
- Varathane Polyurethane
The most important part of any project that requires adhesion is surface prep. That's going to determine how long your results last! So as much of a bummer as it is to deep clean, you don't want to skimp on this step.
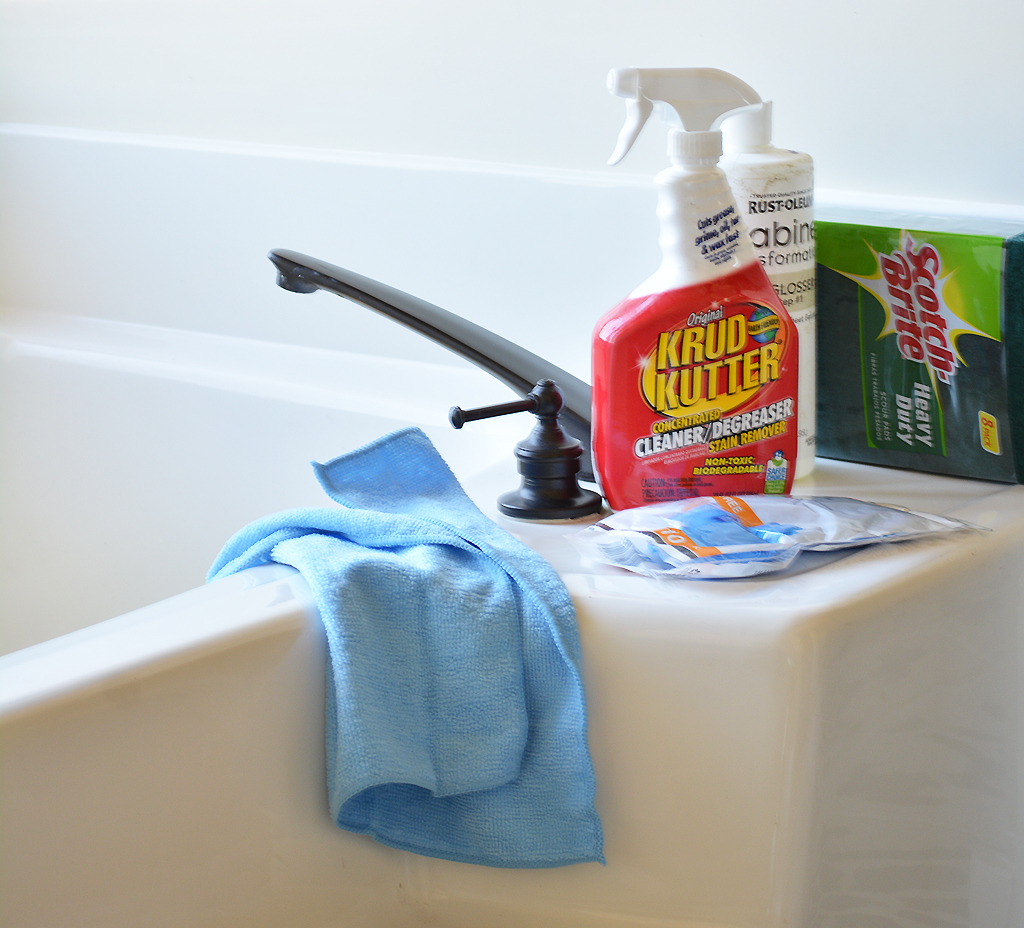
I used disposable gloves to apply Krud Kutter with a Scotch Brite pad to scrub the surface so it was free of any build up and dust, and then I wiped it dry with a microfiber cloth.
Next I applied a deglosser with a new Scotch Brite pad and made sure to scrub vigorously as this will help "scuff up" the surface for better adhesion. I had some deglosser left from my Rustoleum Cabinet Transformations Kit when I painted my kitchen cabinets so I used that, but you can find various deglossers at your local hardware store.
Then I used a damp microfiber cloth to remove the deglosser, followed by a dry microfiber cloth to dry the surface.
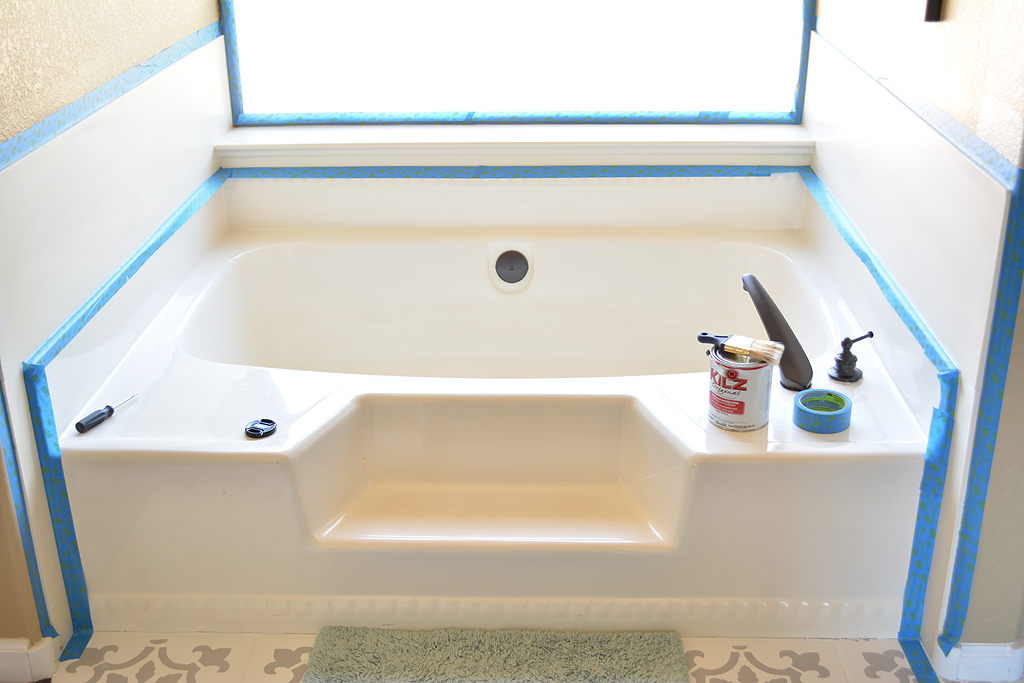
Now it's time to apply the blue painters tape around the edges. The shelf below the window needed some refreshing so I cleaned that using the same method above and included that in my taped off area.

Another important prep step is primer. Since I wasn't working with drywall or a wood surface, primer was necessary. We had this Kilz oil based primer on hand in white so I opened up as many windows as I could for ventilation and applied 2 coats, letting it dry for an hour in between coats.
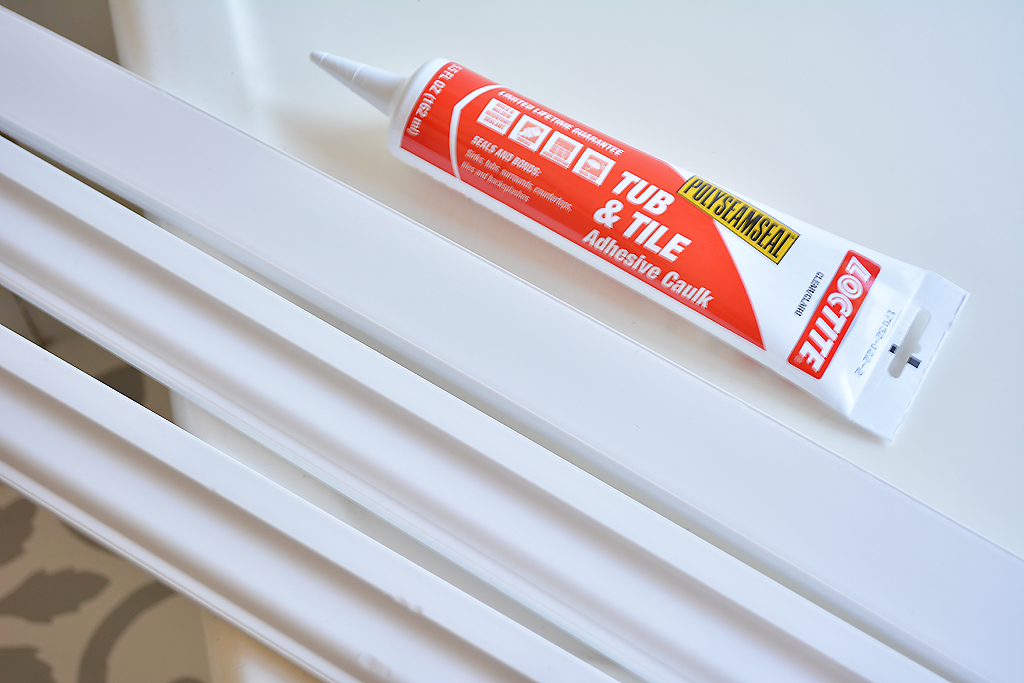
Once the primer was completely dry, it was time to install the moulding using Loctite Tub and Tile adhesive caulk. I chose this because I wanted something that would provide a good application but wouldn't dry too fast, leaving room for a little manipulation once it was applied to the surface.
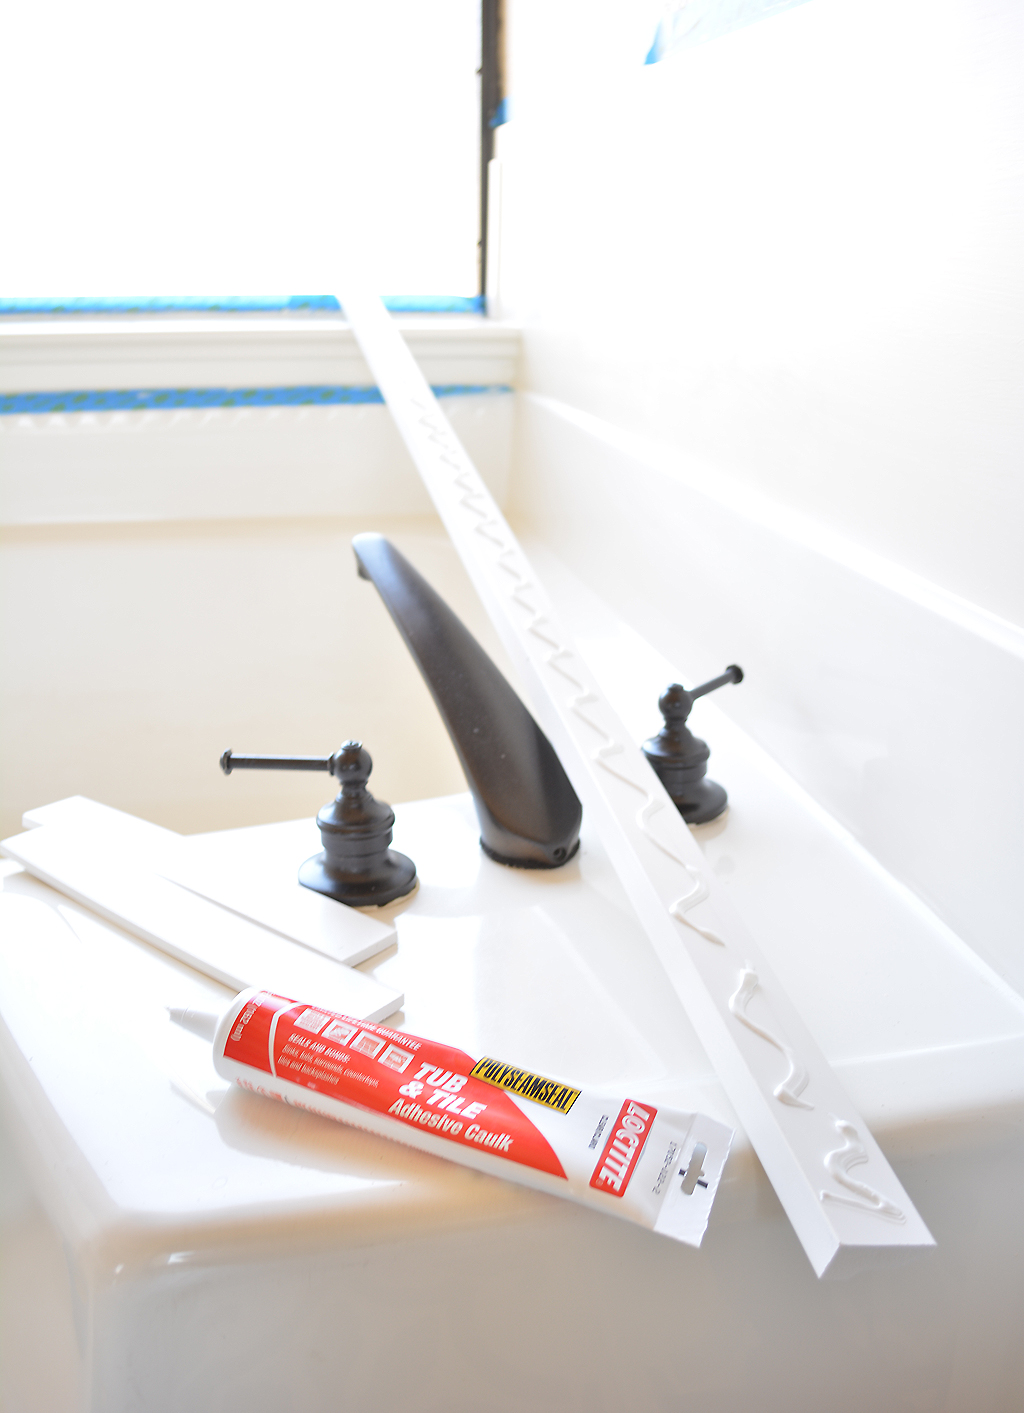
I began with the top moulding piece to ensure it was even with the top of the splash guard by applying the adhesive caulk in a wavy line to be certain the sides stuck well.
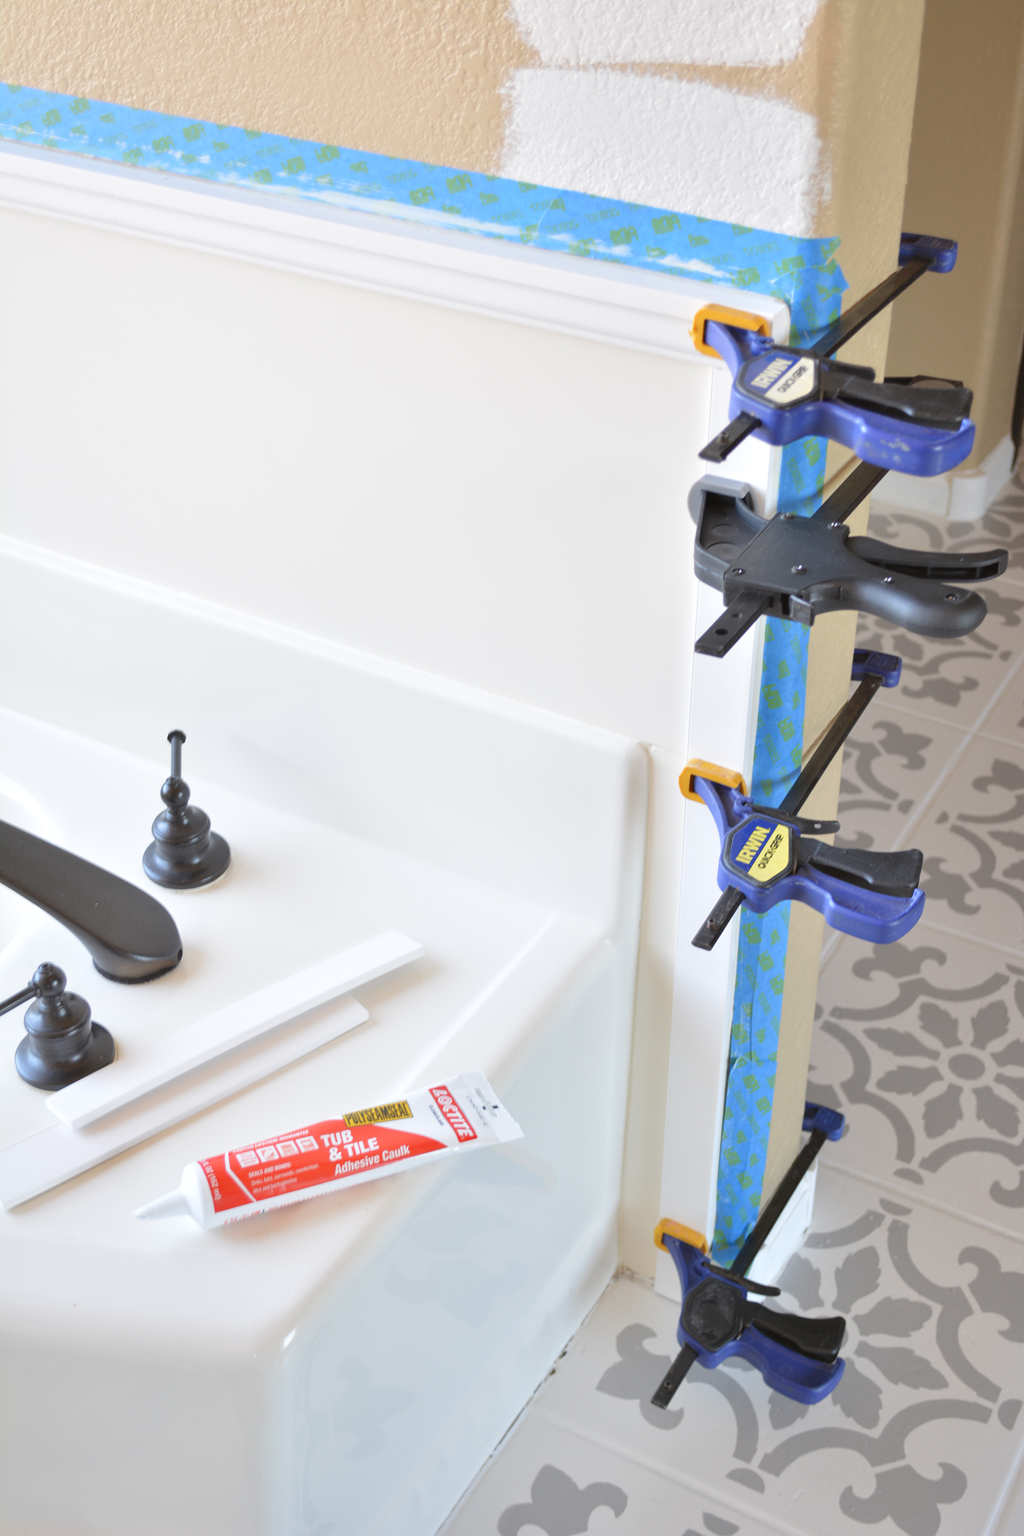
Once I had the top moulding lined up and pressed down well, I used the same method to apply the side trim. My splash guard was installed as two pieces and not flush so I used clamps to help pull the trim into the splashguard nice and tight until the adhesive was dry.
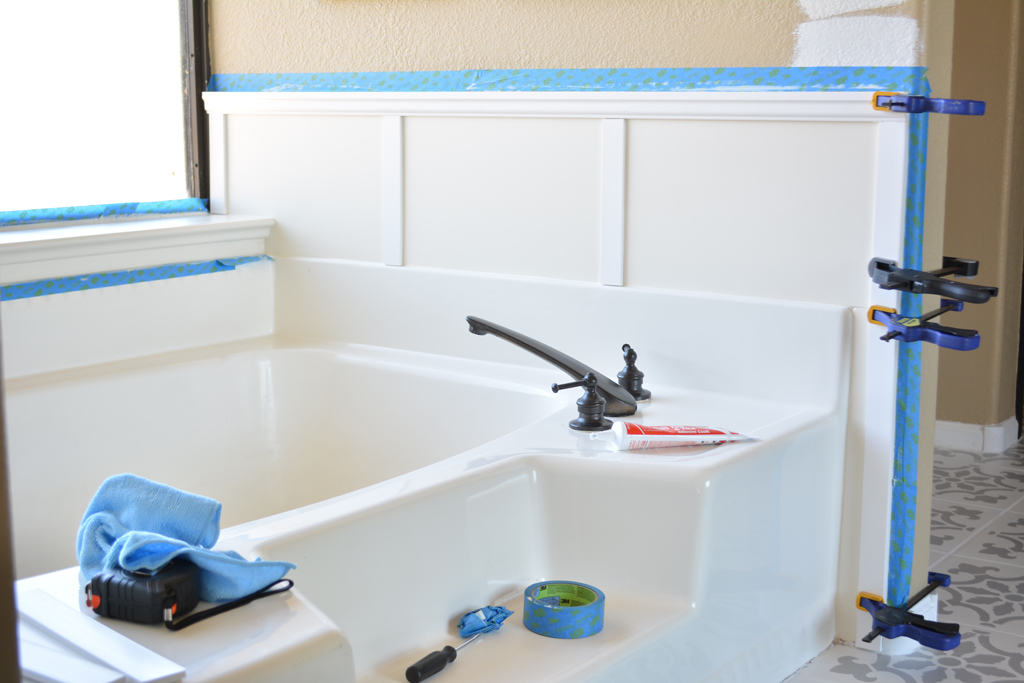
Next up was the other side trim and two middle pieces using the same application technique. I measured the distance between the pieces beforehand to make sure they were evenly spaced upon application, and re-measured for accuracy once I applied them.
TIP: Keep a paper towel or clean microfiber cloth handy to wipe off any excess caulk that seeps out the sides when you press on the trim.

When the trim pieces were dry enough to stay in place, I used the remaining caulk to seal the gaps around the trim so everything appears flush.
I let it dry overnight and then applied two coats of Rustoleum Linen White Chalked Paint inside the taped off areas. The reason I used that paint is because that's what I used on my tile (tutorial to come) and wanted it to be the same shade of white (now I need to paint the tub!).
*Sigh*
Once the paint was dry, I sealed everything with 3 coats of Varathane Polyurethane in Satin.
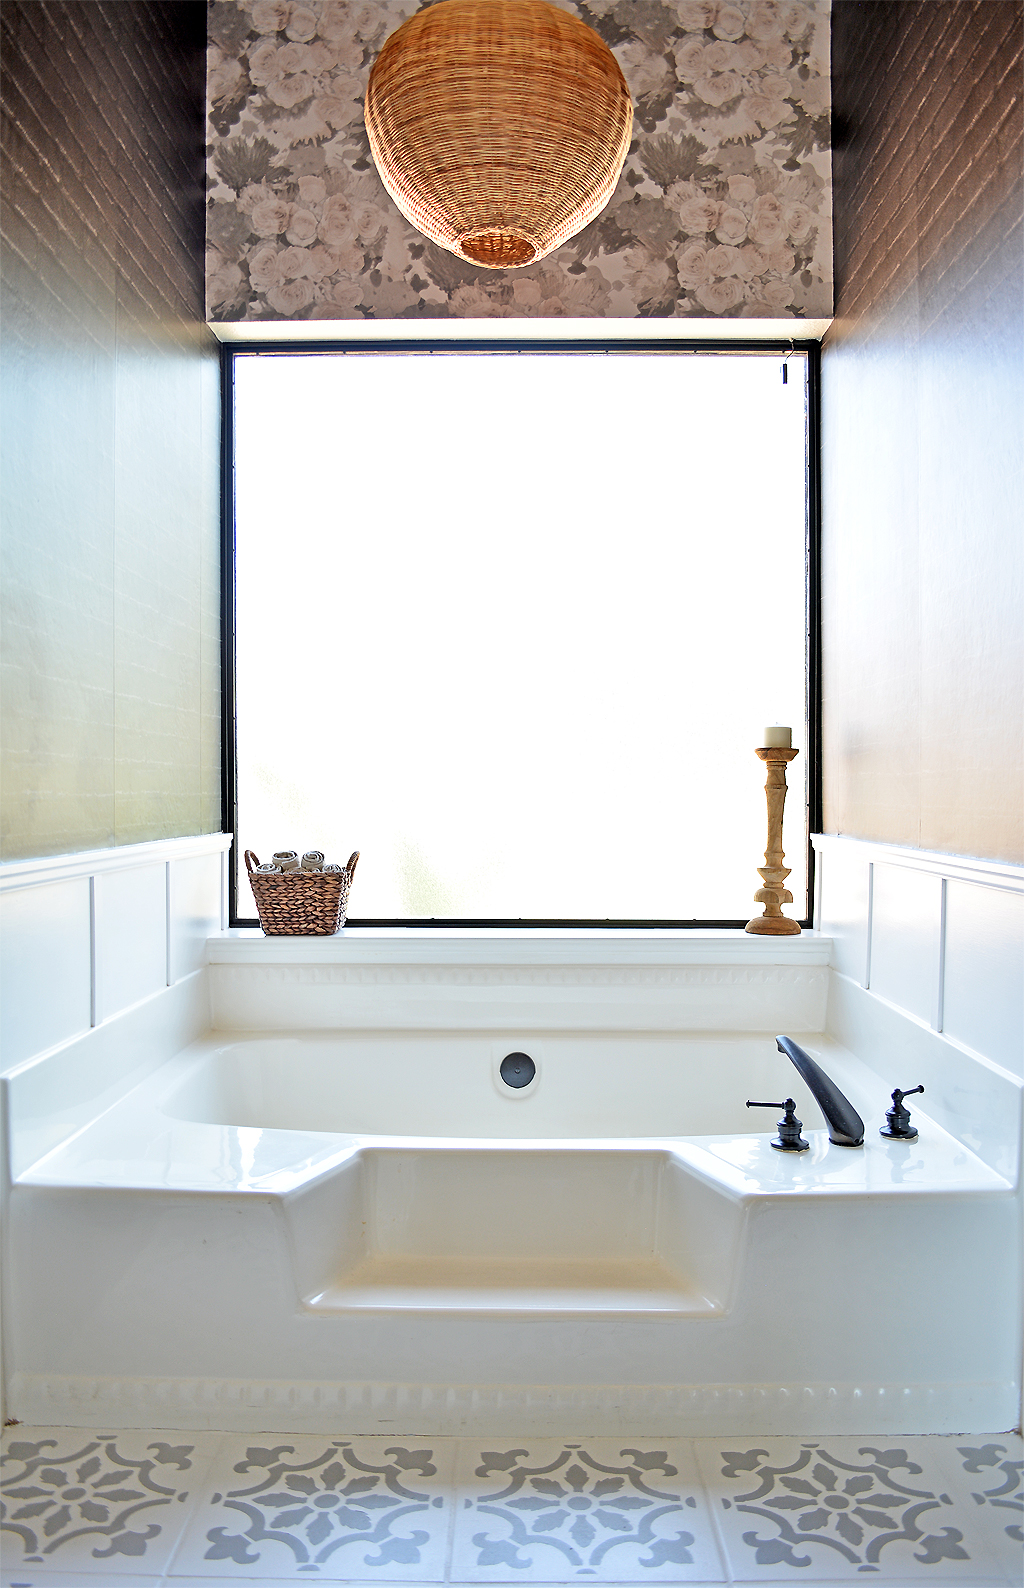
My bathroom remodel is still in progress (but almost finished!) and I will have a full reveal with more product sources and tutorials up on the blog once it's complete, so check back soon!
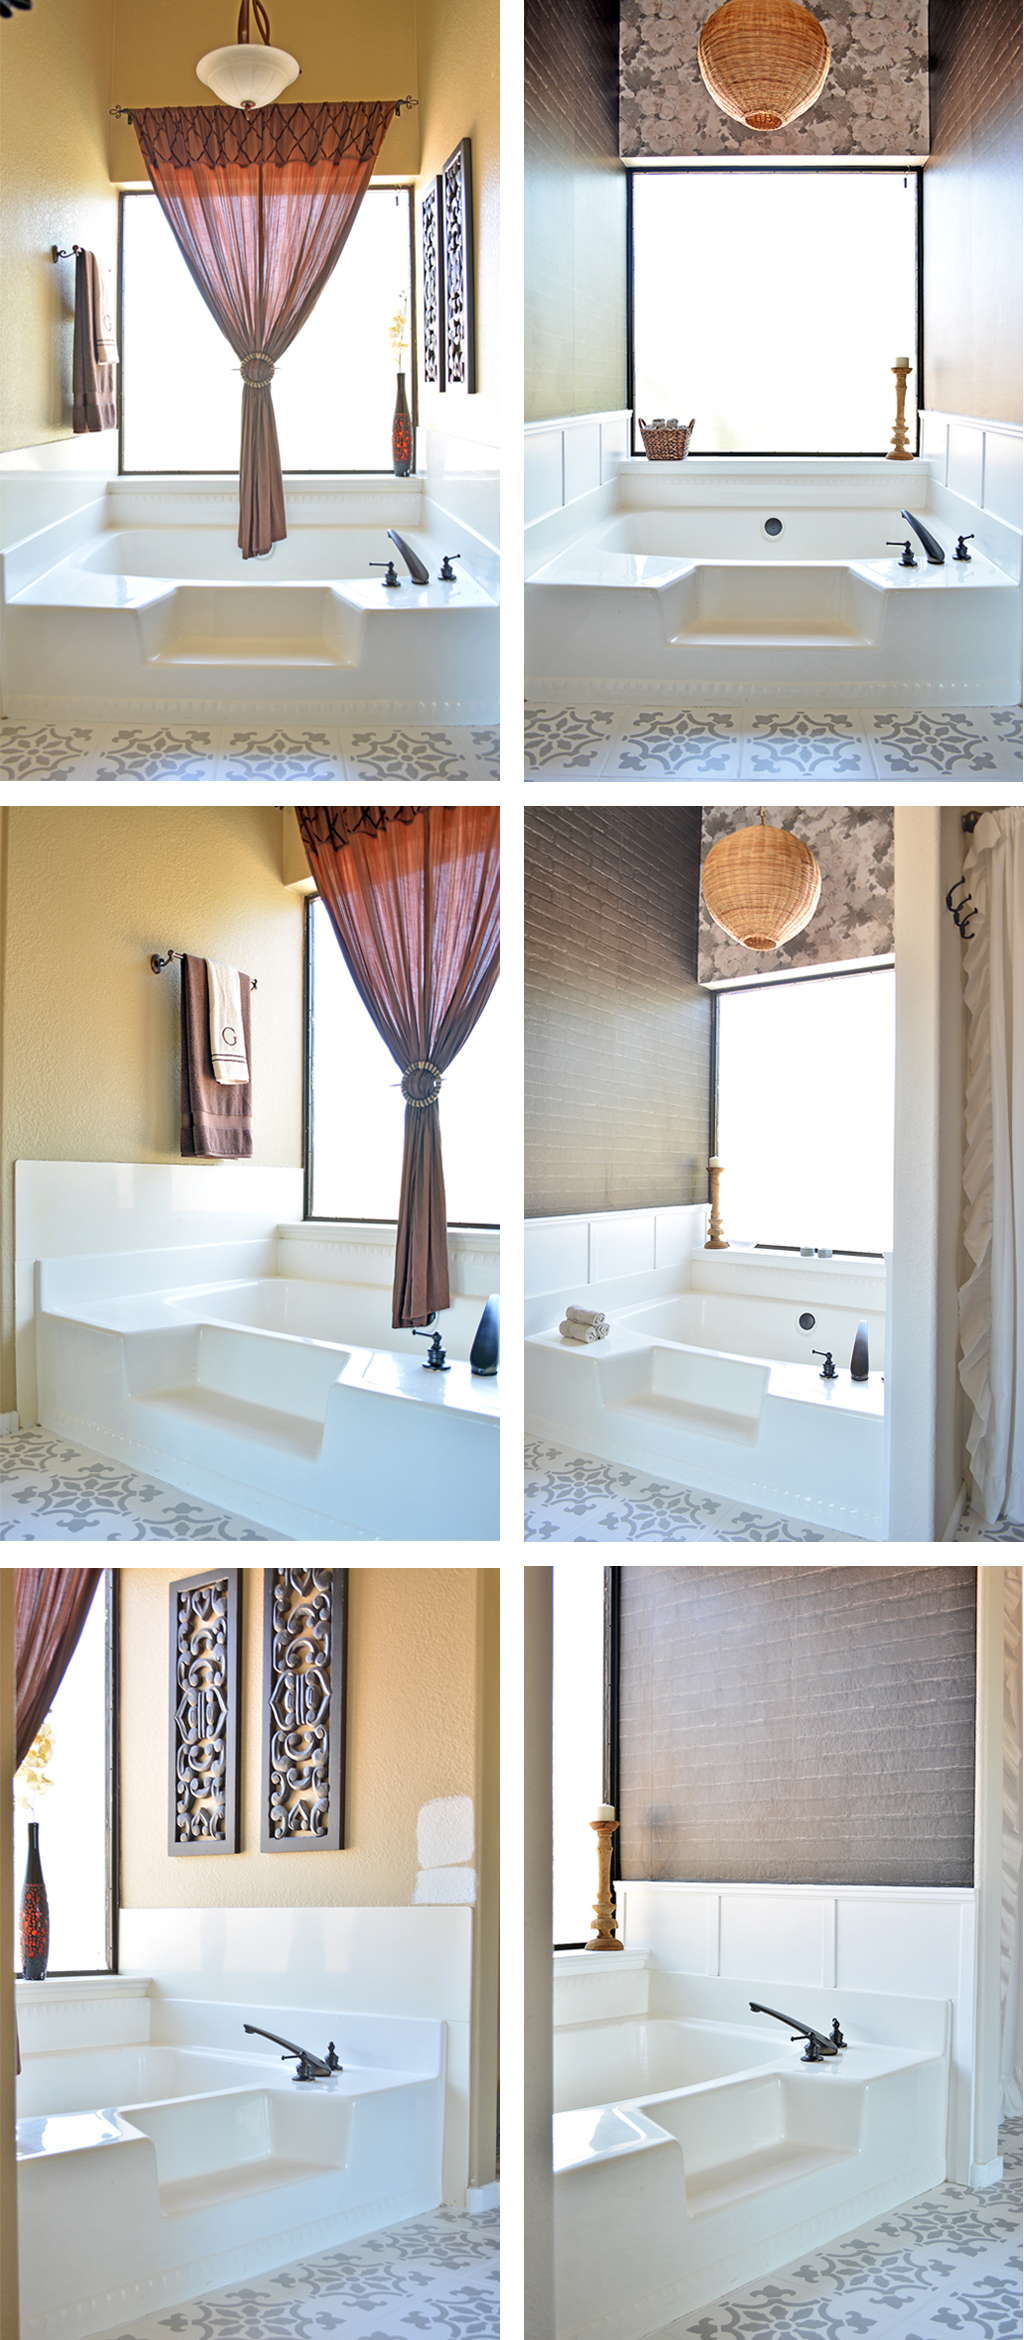
Before and After's are fun, so here are a few of this space...
Happy DIY'ing, and don't forget to pin your favorite image from this post to Pinterest!!
XO,
Christina

Comments
This transformation is
This transformation is fantastic! You did an amazing job. And your Instagram is wonderful.
Thank you so much, Daniel!
Thank you so much, Daniel!
Wow!!!
Wow!!!
Thanks, Jenn!!
Thanks, Jenn!!
Add new comment